/*
ChibiOS/RT - Copyright (C) 2006-2013 Giovanni Di Sirio
Licensed under the Apache License, Version 2.0 (the "License");
you may not use this file except in compliance with the License.
You may obtain a copy of the License at
http://www.apache.org/licenses/LICENSE-2.0
Unless required by applicable law or agreed to in writing, software
distributed under the License is distributed on an "AS IS" BASIS,
WITHOUT WARRANTIES OR CONDITIONS OF ANY KIND, either express or implied.
See the License for the specific language governing permissions and
limitations under the License.
*/
/*
* STM32F30x drivers configuration.
* The following settings override the default settings present in
* the various device driver implementation headers.
* Note that the settings for each driver only have effect if the whole
* driver is enabled in halconf.h.
*
* IRQ priorities:
* 15...0 Lowest...Highest.
*
* DMA priorities:
* 0...3 Lowest...Highest.
*/
#define STM32F30x_MCUCONF
/*
* HAL driver system settings.
*/
#define STM32_NO_INIT FALSE
#define STM32_PVD_ENABLE FALSE
#define STM32_PLS STM32_PLS_LEV0
#define STM32_HSI_ENABLED TRUE
#define STM32_LSI_ENABLED TRUE
#define STM32_HSE_ENABLED TRUE
#define STM32_LSE_ENABLED FALSE
#define STM32_SW STM32_SW_PLL
#define STM32_PLLSRC STM32_PLLSRC_HSE
#define STM32_PREDIV_VALUE 1
#define STM32_PLLMUL_VALUE 9
#define STM32_HPRE STM32_HPRE_DIV1
#define STM32_PPRE1 STM32_PPRE1_DIV2
#define STM32_PPRE2 STM32_PPRE2_DIV2
#define STM32_MCOSEL STM32_MCOSEL_NOCLOCK
#define STM32_ADC12PRES STM32_ADC12PRES_DIV1
#define STM32_ADC34PRES STM32_ADC34PRES_DIV1
#define STM32_USART1SW STM32_USART1SW_PCLK
#define STM32_USART2SW STM32_USART2SW_PCLK
#define STM32_USART3SW STM32_USART3SW_PCLK
#define STM32_UART4SW STM32_UART4SW_PCLK
#define STM32_UART5SW STM32_UART5SW_PCLK
#define STM32_I2C1SW STM32_I2C1SW_SYSCLK
#define STM32_I2C2SW STM32_I2C2SW_SYSCLK
#define STM32_TIM1SW STM32_TIM1SW_PCLK2
#define STM32_TIM8SW STM32_TIM8SW_PCLK2
#define STM32_RTCSEL STM32_RTCSEL_LSI
#define STM32_USB_CLOCK_REQUIRED TRUE
#define STM32_USBPRE STM32_USBPRE_DIV1P5
/*
* ADC driver system settings.
*/
#define STM32_ADC_USE_ADC1 FALSE
#define STM32_ADC_USE_ADC3 FALSE
#define STM32_ADC_ADC12_DMA_PRIORITY 2
#define STM32_ADC_ADC34_DMA_PRIORITY 2
#define STM32_ADC_ADC12_IRQ_PRIORITY 5
#define STM32_ADC_ADC34_IRQ_PRIORITY 5
#define STM32_ADC_ADC12_DMA_IRQ_PRIORITY 5
#define STM32_ADC_ADC34_DMA_IRQ_PRIORITY 5
#define STM32_ADC_ADC12_CLOCK_MODE ADC_CCR_CKMODE_AHB_DIV1
#define STM32_ADC_ADC34_CLOCK_MODE ADC_CCR_CKMODE_AHB_DIV1
#define STM32_ADC_DUAL_MODE FALSE
/*
* CAN driver system settings.
*/
#define STM32_CAN_USE_CAN1 FALSE
#define STM32_CAN_CAN1_IRQ_PRIORITY 11
/*
* EXT driver system settings.
*/
#define STM32_EXT_EXTI0_IRQ_PRIORITY 6
#define STM32_EXT_EXTI1_IRQ_PRIORITY 6
#define STM32_EXT_EXTI2_IRQ_PRIORITY 6
#define STM32_EXT_EXTI3_IRQ_PRIORITY 6
#define STM32_EXT_EXTI4_IRQ_PRIORITY 6
#define STM32_EXT_EXTI5_9_IRQ_PRIORITY 6
#define STM32_EXT_EXTI10_15_IRQ_PRIORITY 6
#define STM32_EXT_EXTI16_IRQ_PRIORITY 6
#define STM32_EXT_EXTI17_IRQ_PRIORITY 6
#define STM32_EXT_EXTI18_IRQ_PRIORITY 6
#define STM32_EXT_EXTI19_IRQ_PRIORITY 6
#define STM32_EXT_EXTI20_IRQ_PRIORITY 6
#define STM32_EXT_EXTI21_22_29_IRQ_PRIORITY 6
#define STM32_EXT_EXTI30_32_IRQ_PRIORITY 6
#define STM32_EXT_EXTI33_IRQ_PRIORITY 6
/*
* GPT driver system settings.
*/
#define STM32_GPT_USE_TIM1 FALSE
#define STM32_GPT_USE_TIM2 FALSE
#define STM32_GPT_USE_TIM3 FALSE
#define STM32_GPT_USE_TIM4 FALSE
#define STM32_GPT_USE_TIM6 FALSE
#define STM32_GPT_USE_TIM7 FALSE
#define STM32_GPT_USE_TIM8 FALSE
#define STM32_GPT_TIM1_IRQ_PRIORITY 7
#define STM32_GPT_TIM2_IRQ_PRIORITY 7
#define STM32_GPT_TIM3_IRQ_PRIORITY 7
#define STM32_GPT_TIM4_IRQ_PRIORITY 7
#define STM32_GPT_TIM6_IRQ_PRIORITY 7
#define STM32_GPT_TIM7_IRQ_PRIORITY 7
#define STM32_GPT_TIM8_IRQ_PRIORITY 7
/*
* I2C driver system settings.
*/
#define STM32_I2C_USE_I2C1 FALSE
#define STM32_I2C_USE_I2C2 FALSE
#define STM32_I2C_BUSY_TIMEOUT 50
#define STM32_I2C_I2C1_IRQ_PRIORITY 10
#define STM32_I2C_I2C2_IRQ_PRIORITY 10
#define STM32_I2C_I2C1_DMA_PRIORITY 1
#define STM32_I2C_I2C2_DMA_PRIORITY 1
#define STM32_I2C_DMA_ERROR_HOOK(i2cp) osalSysHalt("DMA failure")
/*
* ICU driver system settings.
*/
#define STM32_ICU_USE_TIM1 FALSE
#define STM32_ICU_USE_TIM2 FALSE
#define STM32_ICU_USE_TIM3 FALSE
#define STM32_ICU_USE_TIM4 FALSE
#define STM32_ICU_USE_TIM8 FALSE
#define STM32_ICU_TIM1_IRQ_PRIORITY 7
#define STM32_ICU_TIM2_IRQ_PRIORITY 7
#define STM32_ICU_TIM3_IRQ_PRIORITY 7
#define STM32_ICU_TIM4_IRQ_PRIORITY 7
#define STM32_ICU_TIM8_IRQ_PRIORITY 7
/*
* PWM driver system settings.
*/
#define STM32_PWM_USE_ADVANCED FALSE
#define STM32_PWM_USE_TIM1 FALSE
#define STM32_PWM_USE_TIM2 FALSE
#define STM32_PWM_USE_TIM3 FALSE
#define STM32_PWM_USE_TIM4 FALSE
#define STM32_PWM_USE_TIM8 FALSE
#define STM32_PWM_TIM1_IRQ_PRIORITY 7
#define STM32_PWM_TIM2_IRQ_PRIORITY 7
#define STM32_PWM_TIM3_IRQ_PRIORITY 7
#define STM32_PWM_TIM4_IRQ_PRIORITY 7
#define STM32_PWM_TIM8_IRQ_PRIORITY 7
/*
* SERIAL driver system settings.
*/
#define STM32_SERIAL_USE_USART1 FALSE
#define STM32_SERIAL_USE_USART2 FALSE
#define STM32_SERIAL_USE_USART3 FALSE
#define STM32_SERIAL_USE_UART4 FALSE
#define STM32_SERIAL_USE_UART5 FALSE
#define STM32_SERIAL_USART1_PRIORITY 12
#define STM32_SERIAL_USART2_PRIORITY 12
#define STM32_SERIAL_USART3_PRIORITY 12
#define STM32_SERIAL_UART4_PRIORITY 12
#define STM32_SERIAL_UART5_PRIORITY 12
/*
* SPI driver system settings.
*/
#define STM32_SPI_USE_SPI1 FALSE
#define STM32_SPI_USE_SPI2 FALSE
#define STM32_SPI_USE_SPI3 FALSE
#define STM32_SPI_SPI1_DMA_PRIORITY 1
#define STM32_SPI_SPI2_DMA_PRIORITY 1
#define STM32_SPI_SPI3_DMA_PRIORITY 1
#define STM32_SPI_SPI1_IRQ_PRIORITY 10
#define STM32_SPI_SPI2_IRQ_PRIORITY 10
#define STM32_SPI_SPI3_IRQ_PRIORITY 10
#define STM32_SPI_DMA_ERROR_HOOK(spip) osalSysHalt("DMA failure")
/*
* ST driver system settings.
*/
#define STM32_ST_IRQ_PRIORITY 8
#define STM32_ST_USE_TIMER 2
/*
* UART driver system settings.
*/
#define STM32_UART_USE_USART1 TRUE
#define STM32_UART_USE_USART2 TRUE
#define STM32_UART_USE_USART3 TRUE
#define STM32_UART_USART1_IRQ_PRIORITY 12
#define STM32_UART_USART2_IRQ_PRIORITY 12
#define STM32_UART_USART3_IRQ_PRIORITY 12
#define STM32_UART_USART1_DMA_PRIORITY 0
#define STM32_UART_USART2_DMA_PRIORITY 0
#define STM32_UART_USART3_DMA_PRIORITY 0
#define STM32_UART_DMA_ERROR_HOOK(uartp) osalSysHalt("DMA failure")
/*
* USB driver system settings.
*/
#define STM32_USB_USE_USB1 FALSE
#define STM32_USB_LOW_POWER_ON_SUSPEND FALSE
#define STM32_USB_USB1_HP_IRQ_PRIORITY 13
#define STM32_USB_USB1_LP_IRQ_PRIORITY 14
177
178
179
180
181
182
183
184
185
186
187
188
189
190
191
192
193
194
195
196
197
198
199
200
201
202
203
204
205
206
207
208
209
210
211
212
213
214
215
216
217
218
219
220
221
222
223
224
225
226
227
228
229
230
231
232
233
234
235
236
237
238
239
240
241
242
243
244
245
246
247
248
249
250
251
252
253
254
255
256
257
258
259
260
261
262
263
264
265
266
267
268
269
270
271
272
273
274
275
276
277
278
279
280
281
282
283
284
285
286
287
288
289
290
291
292
293
294
295
296
297
298
299
300
301
302
303
304
305
306
307
308
309
310
311
312
313
314
315
316
317
318
319
320
321
322
323
324
325
326
327
328
329
330
331
332
333
334
335
336
337
338
339
340
341
342
343
344
345
346
347
348
349
350
351
352
353
354
355
356
357
358
359
360
361
362
363
364
365
366
367
368
369
370
371
372
373
374
375
376
377
378
379
380
381
382
383
384
385
386
387
388
389
390
391
392
393
394
395
396
397
398
399
400
401
402
403
404
405
406
407
408
409
410
411
412
413
414
415
416
417
418
419
420
421
422
423
424
425
426
427
428
429
430
431
432
433
434
435
436
437
438
439
440
441
442
443
444
445
446
447
448
449
450
451
452
453
454
455
456
457
458
459
460
461
462
463
464
465
466
467
468
469
470
471
472
473
474
475
476
477
478
479
480
481
482
483
484
485
486
487
488
489
490
491
492
493
494
495
496
497
498
499
500
501
502
503
504
505
506
507
508
509
510
511
512
513
514
515
516
517
518
# RGB Lighting
QMK has the ability to control RGB LEDs attached to your keyboard. This is commonly called *underglow*, due to the LEDs often being mounted on the bottom of the keyboard, producing a nice diffused effect when combined with a translucent case.
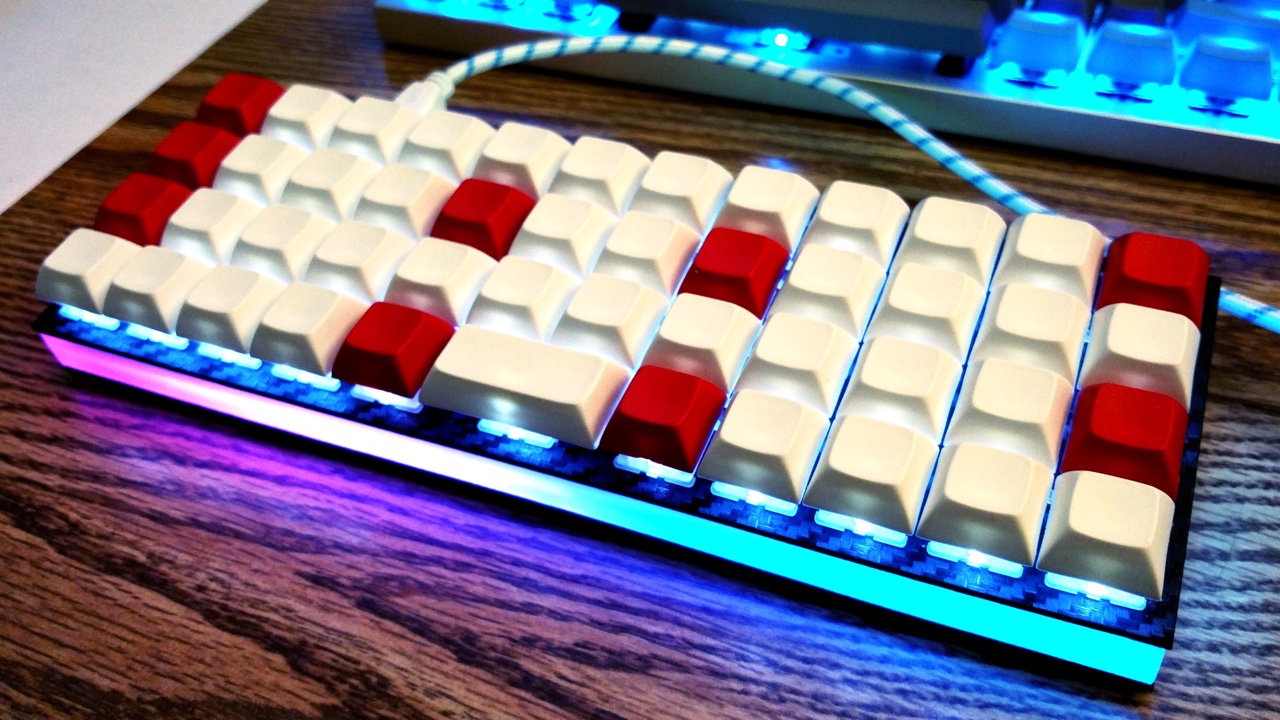
Some keyboards come with RGB LEDs preinstalled. Others must have them installed after the fact. See the [Hardware Modification](#hardware-modification) section for information on adding RGB lighting to your keyboard.
Currently QMK supports the following addressable LEDs (however, the white LED in RGBW variants is not supported):
* WS2811, WS2812, WS2812B, WS2812C, etc.
* SK6812, SK6812MINI, SK6805
These LEDs are called "addressable" because instead of using a wire per color, each LED contains a small microchip that understands a special protocol sent over a single wire. The chip passes on the remaining data to the next LED, allowing them to be chained together. In this way, you can easily control the color of the individual LEDs.
## Usage
On keyboards with onboard RGB LEDs, it is usually enabled by default. If it is not working for you, check that your `rules.mk` includes the following:
```make
RGBLIGHT_ENABLE = yes
```
At minimum you must define the data pin your LED strip is connected to, and the number of LEDs in the strip, in your `config.h`. If your keyboard has onboard RGB LEDs, and you are simply creating a keymap, you usually won't need to modify these.
|Define |Description |
|---------------|---------------------------------------------------------------------------------------------------------|
|`RGB_DI_PIN` |The pin connected to the data pin of the LEDs |
|`RGBLED_NUM` |The number of LEDs connected |
|`RGBLED_SPLIT` |(Optional) For split keyboards, the number of LEDs connected on each half directly wired to `RGB_DI_PIN` |
Then you should be able to use the keycodes below to change the RGB lighting to your liking.
### Color Selection
QMK uses [Hue, Saturation, and Value](https://en.wikipedia.org/wiki/HSL_and_HSV) to select colors rather than RGB. The color wheel below demonstrates how this works.
<img src="gitbook/images/color-wheel.svg" alt="HSV Color Wheel" width="250"/>
Changing the **Hue** cycles around the circle.<br>
Changing the **Saturation** moves between the inner and outer sections of the wheel, affecting the intensity of the color.<br>
Changing the **Value** sets the overall brightness.<br>
## Keycodes
|Key |Aliases |Description |
|-------------------|----------|--------------------------------------------------------------------|
|`RGB_TOG` | |Toggle RGB lighting on or off |
|`RGB_MODE_FORWARD` |`RGB_MOD` |Cycle through modes, reverse direction when Shift is held |
|`RGB_MODE_REVERSE` |`RGB_RMOD`|Cycle through modes in reverse, forward direction when Shift is held|
|`RGB_HUI` | |Increase hue, decrease hue when Shift is held |
|`RGB_HUD` | |Decrease hue, increase hue when Shift is held |
|`RGB_SAI` | |Increase saturation, decrease saturation when Shift is held |
|`RGB_SAD` | |Decrease saturation, increase saturation when Shift is held |
|`RGB_VAI` | |Increase value (brightness), decrease value when Shift is held |
|`RGB_VAD` | |Decrease value (brightness), increase value when Shift is held |
|`RGB_MODE_PLAIN` |`RGB_M_P `|Static (no animation) mode |
|`RGB_MODE_BREATHE` |`RGB_M_B` |Breathing animation mode |
|`RGB_MODE_RAINBOW` |`RGB_M_R` |Rainbow animation mode |
|`RGB_MODE_SWIRL` |`RGB_M_SW`|Swirl animation mode |
|`RGB_MODE_SNAKE` |`RGB_M_SN`|Snake animation mode |
|`RGB_MODE_KNIGHT` |`RGB_M_K` |"Knight Rider" animation mode |
|`RGB_MODE_XMAS` |`RGB_M_X` |Christmas animation mode |
|`RGB_MODE_GRADIENT`|`RGB_M_G` |Static gradient animation mode |
|`RGB_MODE_RGBTEST` |`RGB_M_T` |Red, Green, Blue test animation mode |
!> By default, if you have both the RGB Light and the [RGB Matrix](feature_rgb_matrix.md) feature enabled, these keycodes will work for both features, at the same time. You can disable the keycode functionality by defining the `*_DISABLE_KEYCODES` option for the specific feature.
## Configuration
Your RGB lighting can be configured by placing these `#define`s in your `config.h`:
|Define |Default |Description |
|---------------------|-------------|-----------------------------------------------------------------------------|
|`RGBLIGHT_HUE_STEP` |`10` |The number of steps to cycle through the hue by |
|`RGBLIGHT_SAT_STEP` |`17` |The number of steps to increment the saturation by |
|`RGBLIGHT_VAL_STEP` |`17` |The number of steps to increment the brightness by |
|`RGBLIGHT_LIMIT_VAL` |`255` |The maximum brightness level |
|`RGBLIGHT_SLEEP` |*Not defined*|If defined, the RGB lighting will be switched off when the host goes to sleep|
|`RGBLIGHT_SPLIT` |*Not defined*|If defined, synchronization functionality for split keyboards is added|
|`RGBLIGHT_DISABLE_KEYCODES`|*not defined*|If defined, disables the ability to control RGB Light from the keycodes. You must use code functions to control the feature|
## Effects and Animations
Not only can this lighting be whatever color you want,
if `RGBLIGHT_EFFECT_xxxx` or `RGBLIGHT_ANIMATIONS` is defined, you also have a number of animation modes at your disposal:
|Mode number symbol |Additional number |Description |
|-----------------------------|-------------------|---------------------------------------|
|`RGBLIGHT_MODE_STATIC_LIGHT` | *None* |Solid color (this mode is always enabled) |
|`RGBLIGHT_MODE_BREATHING` | 0,1,2,3 |Solid color breathing |
|`RGBLIGHT_MODE_RAINBOW_MOOD` | 0,1,2 |Cycling rainbow |
|`RGBLIGHT_MODE_RAINBOW_SWIRL`| 0,1,2,3,4,5 |Swirling rainbow |
|`RGBLIGHT_MODE_SNAKE` | 0,1,2,3,4,5 |Snake |
|`RGBLIGHT_MODE_KNIGHT` | 0,1,2 |Knight |
|`RGBLIGHT_MODE_CHRISTMAS` | *None* |Christmas |
|`RGBLIGHT_MODE_STATIC_GRADIENT`| 0,1,..,9 |Static gradient |
|`RGBLIGHT_MODE_RGB_TEST` | *None* |RGB Test |
|`RGBLIGHT_MODE_ALTERNATING` | *None* |Alternating |
|`RGBLIGHT_MODE_TWINKLE` | 0,1,2,3,4,5 |Twinkle |
Check out [this video](https://youtube.com/watch?v=VKrpPAHlisY) for a demonstration.
Note: For versions older than 0.6.117, The mode numbers were written directly. In `quantum/rgblight.h` there is a contrast table between the old mode number and the current symbol.
### Effect and Animation Toggles
Use these defines to add or remove animations from the firmware. When you are running low on flash space, it can be helpful to disable animations you are not using.
|Define |Default |Description |
|------------------------------------|-------------|-------------------------------------------------------------------------|
|`RGBLIGHT_ANIMATIONS` |*Not defined*|Enable all additional animation modes. |
|`RGBLIGHT_EFFECT_ALTERNATING` |*Not defined*|Enable alternating animation mode. |
|`RGBLIGHT_EFFECT_BREATHING` |*Not defined*|Enable breathing animation mode. |
|`RGBLIGHT_EFFECT_CHRISTMAS` |*Not defined*|Enable christmas animation mode. |
|`RGBLIGHT_EFFECT_KNIGHT` |*Not defined*|Enable knight animation mode. |
|`RGBLIGHT_EFFECT_RAINBOW_MOOD` |*Not defined*|Enable rainbow mood animation mode. |
|`RGBLIGHT_EFFECT_RAINBOW_SWIRL` |*Not defined*|Enable rainbow swirl animation mode. |
|`RGBLIGHT_EFFECT_RGB_TEST` |*Not defined*|Enable RGB test animation mode. |
|`RGBLIGHT_EFFECT_SNAKE` |*Not defined*|Enable snake animation mode. |
|`RGBLIGHT_EFFECT_STATIC_GRADIENT` |*Not defined*|Enable static gradient mode. |
|`RGBLIGHT_EFFECT_TWINKLE` |*Not defined*|Enable twinkle animation mode. |
### Effect and Animation Settings
The following options are used to tweak the various animations:
|Define |Default |Description |
|------------------------------------|-------------|-------------------------------------------------------------------------------------|
|`RGBLIGHT_EFFECT_BREATHE_CENTER` |*Not defined*|If defined, used to calculate the curve for the breathing animation. Valid values are 1.0 to 2.7 |
|`RGBLIGHT_EFFECT_BREATHE_MAX` |`255` |The maximum brightness for the breathing mode. Valid values are 1 to 255 |
|`RGBLIGHT_EFFECT_CHRISTMAS_INTERVAL`|`1000` |How long to wait between light changes for the "Christmas" animation, in milliseconds|
|`RGBLIGHT_EFFECT_CHRISTMAS_STEP` |`2` |The number of LEDs to group the red/green colors by for the "Christmas" animation |
|`RGBLIGHT_EFFECT_KNIGHT_LED_NUM` |`RGBLED_NUM` |The number of LEDs to have the "Knight" animation travel |
|`RGBLIGHT_EFFECT_KNIGHT_LENGTH` |`3` |The number of LEDs to light up for the "Knight" animation |
|`RGBLIGHT_EFFECT_KNIGHT_OFFSET` |`0` |The number of LEDs to start the "Knight" animation from the start of the strip by |
|`RGBLIGHT_RAINBOW_SWIRL_RANGE` |`255` |Range adjustment for the rainbow swirl effect to get different swirls |
|`RGBLIGHT_EFFECT_SNAKE_LENGTH` |`4` |The number of LEDs to light up for the "Snake" animation |
|`RGBLIGHT_EFFECT_TWINKLE_LIFE` |`75` |Adjusts how quickly each LED brightens and dims when twinkling (in animation steps) |
|`RGBLIGHT_EFFECT_TWINKLE_PROBABILITY`|`1/127` |Adjusts how likely each LED is to twinkle (on each animation step) |
### Example Usage to Reduce Memory Footprint
1. Remove `RGBLIGHT_ANIMATIONS` from `config.h`.
1. Selectively add the animations you want to enable. The following would enable two animations and save about 4KiB:
```diff
#undef RGBLED_NUM
-#define RGBLIGHT_ANIMATIONS
+#define RGBLIGHT_EFFECT_STATIC_GRADIENT
+#define RGBLIGHT_EFFECT_RAINBOW_SWIRL
#define RGBLED_NUM 12
#define RGBLIGHT_HUE_STEP 8
#define RGBLIGHT_SAT_STEP 8
```
### Animation Speed
You can also modify the speeds that the different modes animate at:
Here is a quick demo on Youtube (with NPKC KC60) (https://www.youtube.com/watch?v=VKrpPAHlisY).
```c
// How long (in milliseconds) to wait between animation steps for each of the "Solid color breathing" animations
const uint8_t RGBLED_BREATHING_INTERVALS[] PROGMEM = {30, 20, 10, 5};
// How long (in milliseconds) to wait between animation steps for each of the "Cycling rainbow" animations
const uint8_t RGBLED_RAINBOW_MOOD_INTERVALS[] PROGMEM = {120, 60, 30};
// How long (in milliseconds) to wait between animation steps for each of the "Swirling rainbow" animations
const uint8_t RGBLED_RAINBOW_SWIRL_INTERVALS[] PROGMEM = {100, 50, 20};
// How long (in milliseconds) to wait between animation steps for each of the "Snake" animations
const uint8_t RGBLED_SNAKE_INTERVALS[] PROGMEM = {100, 50, 20};
// How long (in milliseconds) to wait between animation steps for each of the "Knight" animations
const uint8_t RGBLED_KNIGHT_INTERVALS[] PROGMEM = {127, 63, 31};
// How long (in milliseconds) to wait between animation steps for each of the "Twinkle" animations
const uint8_t RGBLED_TWINKLE_INTERVALS[] PROGMEM = {50, 25, 10};
// These control which hues are selected for each of the "Static gradient" modes
const uint8_t RGBLED_GRADIENT_RANGES[] PROGMEM = {255, 170, 127, 85, 64};
```
## Lighting Layers
By including `#define RGBLIGHT_LAYERS` in your `config.h` file you can enable lighting layers. These make
it easy to use your underglow LEDs as status indicators to show which keyboard layer is currently active, or the state of caps lock, all without disrupting any animations. [Here's a video](https://youtu.be/uLGE1epbmdY) showing an example of what you can do.
### Defining Lighting Layers :id=defining-lighting-layers
By default, 8 layers are possible. This can be expanded to as many as 32 by overriding the definition of `RGBLIGHT_MAX_LAYERS` in `config.h` (e.g. `#define RGBLIGHT_MAX_LAYERS 32`). Please note, if you use a split keyboard, you will need to flash both sides of the split after changing this. Also, increasing the maximum will increase the firmware size, and will slow sync on split keyboards.
To define a layer, we modify `keymap.c` to list out LED ranges and the colors we want to overlay on them using an array of `rgblight_segment_t` using the `RGBLIGHT_LAYER_SEGMENTS` macro. We can define multiple layers and enable/disable them independently:
```c
// Light LEDs 6 to 9 and 12 to 15 red when caps lock is active. Hard to ignore!
const rgblight_segment_t PROGMEM my_capslock_layer[] = RGBLIGHT_LAYER_SEGMENTS(
{6, 4, HSV_RED}, // Light 4 LEDs, starting with LED 6
{12, 4, HSV_RED} // Light 4 LEDs, starting with LED 12
);
// Light LEDs 9 & 10 in cyan when keyboard layer 1 is active
const rgblight_segment_t PROGMEM my_layer1_layer[] = RGBLIGHT_LAYER_SEGMENTS(
{9, 2, HSV_CYAN}
);
// Light LEDs 11 & 12 in purple when keyboard layer 2 is active
const rgblight_segment_t PROGMEM my_layer2_layer[] = RGBLIGHT_LAYER_SEGMENTS(
{11, 2, HSV_PURPLE}
);
// etc..
```
We combine these layers into an array using the `RGBLIGHT_LAYERS_LIST` macro, and assign it to the `rgblight_layers` variable during keyboard setup. Note that you can only define up to 8 lighting layers. Any extra layers will be ignored. Since the different lighting layers overlap, the order matters in the array, with later layers taking precedence:
```c
// Now define the array of layers. Later layers take precedence
const rgblight_segment_t* const PROGMEM my_rgb_layers[] = RGBLIGHT_LAYERS_LIST(
my_capslock_layer,
my_layer1_layer, // Overrides caps lock layer
my_layer2_layer // Overrides other layers
);
void keyboard_post_init_user(void) {
// Enable the LED layers
rgblight_layers = my_rgb_layers;
}
```
Note: For split keyboards with two controllers, both sides need to be flashed when updating the contents of rgblight_layers.
### Enabling and disabling lighting layers :id=enabling-lighting-layers
Everything above just configured the definition of each lighting layer.
We can now enable and disable the lighting layers whenever the state of the keyboard changes:
```c
layer_state_t layer_state_set_user(layer_state_t state) {
// Both layers will light up if both kb layers are active
rgblight_set_layer_state(1, layer_state_cmp(state, 1));
rgblight_set_layer_state(2, layer_state_cmp(state, 2));
return state;
}
bool led_update_user(led_t led_state) {
rgblight_set_layer_state(0, led_state.caps_lock);
return true;
}
```
### Lighting layer blink :id=lighting-layer-blink
By including `#define RGBLIGHT_LAYER_BLINK` in your `config.h` file you can turn a lighting
layer on for a specified duration. Once the specified number of milliseconds has elapsed
the layer will be turned off. This is useful, e.g., if you want to acknowledge some
action (e.g. toggling some setting):
```c
const rgblight_segment_t PROGMEM _yes_layer[] = RGBLIGHT_LAYER_SEGMENTS( {9, 6, HSV_GREEN} );
const rgblight_segment_t PROGMEM _no_layer[] = RGBLIGHT_LAYER_SEGMENTS( {9, 6, HSV_RED} );
const rgblight_segment_t* const PROGMEM _rgb_layers[] =
RGBLIGHT_LAYERS_LIST( _yes_layer, _no_layer );
void keyboard_post_init_user(void) {
rgblight_layers = _rgb_layers;
}
// Note we user post_process_record_user because we want the state
// after the flag has been flipped...
void post_process_record_user(uint16_t keycode, keyrecord_t *record) {
switch (keycode) {
case DEBUG:
rgblight_blink_layer(debug_enable ? 0 : 1, 500);
break;
case NK_TOGG:
case NK_ON:
case NK_OFF:
rgblight_blink_layer(keymap_config.nkro ? 0 : 1, 500);
break;
}
}
```
### Overriding RGB Lighting on/off status
Normally lighting layers are not shown when RGB Lighting is disabled (e.g. with `RGB_TOG` keycode). If you would like lighting layers to work even when the RGB Lighting is otherwise off, add `#define RGBLIGHT_LAYERS_OVERRIDE_RGB_OFF` to your `config.h`.
## Functions
If you need to change your RGB lighting in code, for example in a macro to change the color whenever you switch layers, QMK provides a set of functions to assist you. See [`rgblight.h`](https://github.com/qmk/qmk_firmware/blob/master/quantum/rgblight.h) for the full list, but the most commonly used functions include:
### Utility Functions
|Function |Description |
|--------------------------------------------|-------------------------------------------------------------------|
|`sethsv(hue, sat, val, ledbuf)` |Set ledbuf to the given HSV value |
|`sethsv_raw(hue, sat, val, ledbuf)` |Set ledbuf to the given HSV value without RGBLIGHT_LIMIT_VAL check |
|`setrgb(r, g, b, ledbuf)` |Set ledbuf to the given RGB value where `r`/`g`/`b` |
### Low level Functions
|Function |Description |
|--------------------------------------------|-------------------------------------------|
|`rgblight_set()` |Flash out led buffers to LEDs |
|`rgblight_set_clipping_range(pos, num)` |Set clipping Range. see [Clipping Range](#clipping-range) |
Example:
```c
sethsv(HSV_WHITE, (LED_TYPE *)&led[0]); // led 0
sethsv(HSV_RED, (LED_TYPE *)&led[1]); // led 1
sethsv(HSV_GREEN, (LED_TYPE *)&led[2]); // led 2
rgblight_set(); // Utility functions do not call rgblight_set() automatically, so they need to be called explicitly.
```
### Effects and Animations Functions
#### effect range setting
|Function |Description |
|--------------------------------------------|------------------|
|`rgblight_set_effect_range(pos, num)` |Set Effects Range |
#### direct operation
|Function |Description |
|--------------------------------------------|-------------|
|`rgblight_setrgb_at(r, g, b, index)` |Set a single LED to the given RGB value, where `r`/`g`/`b` are between 0 and 255 and `index` is between 0 and `RGBLED_NUM` (not written to EEPROM) |
|`rgblight_sethsv_at(h, s, v, index)` |Set a single LED to the given HSV value, where `h`/`s`/`v` are between 0 and 255, and `index` is between 0 and `RGBLED_NUM` (not written to EEPROM) |
|`rgblight_setrgb_range(r, g, b, start, end)`|Set a continuous range of LEDs to the given RGB value, where `r`/`g`/`b` are between 0 and 255 and `start`(included) and `stop`(excluded) are between 0 and `RGBLED_NUM` (not written to EEPROM)|
|`rgblight_sethsv_range(h, s, v, start, end)`|Set a continuous range of LEDs to the given HSV value, where `h`/`s`/`v` are between 0 and 255, and `start`(included) and `stop`(excluded) are between 0 and `RGBLED_NUM` (not written to EEPROM)|
|`rgblight_setrgb(r, g, b)` |Set effect range LEDs to the given RGB value where `r`/`g`/`b` are between 0 and 255 (not written to EEPROM) |
|